Qimage - Learn by Example:
A general note on using these examples: Qimage always
remembers all program selections (parameters) so that the next
time you use the software, you will start with the same settings
you used in your last session. For this reason, once you've
performed steps such as selecting a placement method, fitting and
image lock, you will not have to perform these same steps each
time. For example, once you perform steps 1 through 3 in example
2, there is no need to repeat them again since these settings
will be retained.
Table of Contents:
Section I: The Basics
- Example 1: Setting Qimage to Produce
Maximum Quality Prints
- Example 1a: Setting Qimage to
Produce Borderless Prints
- Example 2: Printing Multiple Images
at the Same Size (in this example, 4x6 images)
- Example 2a: Printing Multiple
Images at the most "compatible" size
- Example 3: Printing Multiple Images
at Different Sizes (in this example, one 7x5, one 5x3 and
one 3x2)
- Example 3a: Moving the Crop Area
when "Crop Image" is Turned On (instead of
accepting the default "crop center of photo")
- Example 3b: Printing Images at
their Original (Scanned) Size
- Example 3c: Reviewing Images and
Selecting Prints in an Integrated Workflow
- Example 4: Printing Many Copies of
One Image (in this example, 9 wallets at 3x2 size)
- Example 5: Printing a Specified
Number of Prints to Each Page (in this example, dividing
the page into 9 prints as large as possible on the page)
- Example 6: Printing a Multi Page
Poster of a Single Image (in this example, printing a 2
page by 2 page poster for a total of 4 pages)
- Example 6a: Using the poster
feature to overcome your print driver's maximum page
length limitation
- Example 7: Printing a Contact Sheet
of Small Images that Includes the File Name Under Each
Print
- Example 7a: Printing a Professional
Contact Sheet of Small Images that Includes image and
EXIF info
- Example 7b: Printing a Package of
Predefined Sizes for all Selected Images (in this case
three 4x6 and one 3x2 print)
- Example 7c: Printing Order Sheets
and Fulfilling Customer Orders
- Example 8: Printing a Text
Annotation Under Prints
- Example 9: Creating a Layout that
Specifies Custom Image Sizes/Locations (in this example,
one 4x6 and four 3x2 prints)
- Example 10: Printing Using Custom
Templates Created in Example 9
- Example 11: Creating a Single Multi-Purpose
Crop that Works for Multiple Print Sizes (in this example,
a 5x7, 4x6, and 3.5x5 print)
- Example 12: Downsizing Images for
Web/E-mail
- Example 12a: Upsampling Images to
Increase Resolution
- Example 13: Converting Images (in
this example, Nikon D1 NEF Images to TIF)
- Example 14: Viewing and Printing
Raw Images
Section II: Making Changes
Section III: Working with ICC Profiles
Section IV: Advanced Printing
Section IV: Advanced Profiling
Section I: The Basics
Example 1: Setting Qimage to Produce
Maximum Quality Prints
 Click the "Printer Setup" tool
button. Select your photo printer and click "Properties"
for the printer, making sure that your printer driver
settings are set to the highest quality photo settings
and select the appropriate media type/size (photo glossy,
etc).
Click the "Printer Setup" tool
button. Select your photo printer and click "Properties"
for the printer, making sure that your printer driver
settings are set to the highest quality photo settings
and select the appropriate media type/size (photo glossy,
etc). Click the "Job Properties"
tab on the lower right of the main window and make sure that your "Interp."
method is set to "Hybrid". Also make sure that your first "Res" value
(output resolution for prints) is set to "Max" and the second Res value
(output resolution for posters) is set to "High".
Click the "Job Properties"
tab on the lower right of the main window and make sure that your "Interp."
method is set to "Hybrid". Also make sure that your first "Res" value
(output resolution for prints) is set to "Max" and the second Res value
(output resolution for posters) is set to "High". - Still on the
"Job Properties" tab, leave "Prtr ICC" set to "OFF" if you do not have a
custom printer ICC profile for the printer, paper, and
ink you are using. If you have obtained or created an
accurate ICC profile for your printer and the type of
media you are using, activate that profile in "Prtr ICC". Before activating any profile, make sure you
know the proper print driver settings to use with the
profile because an ICC profile will only work properly
with specific print driver settings. See the
Color Management section for more
details.
 Finally,
on the "Job Properties" tab, make sure that
all checkboxes are not checked.
This will ensure that no borders or text information are
printed with your prints, and will ensure that no global
or print filter is active that may affect the appearance
of prints.
Finally,
on the "Job Properties" tab, make sure that
all checkboxes are not checked.
This will ensure that no borders or text information are
printed with your prints, and will ensure that no global
or print filter is active that may affect the appearance
of prints.
Example 1a: Setting Qimage to Produce
Borderless Prints
Background: Qimage gets page size information from your
print driver so to print borderless prints, we must set the
print driver properties for the paper size we are using and
tell the driver to print borderless on that paper. Note that
not all printers support borderless printing and some print
drivers may only support borderless printing on certain types/sizes
of paper. Assuming your printer and print driver support
borderless printing, the following example will produce
bordlerless prints from Qimage. Note that if borderless is not
supported on your paper/media, no software will be
able to overcome these printer/driver limitations.
 Navigate to
a folder that contains images using the folder browser
directly above the thumbnail grid on the main
window. If the folder browsing panel above the thumbnails
is not visible, you can show the panel by clicking on the bar
labeled "Folders" above
the thumbnail grid. When you have selected a folder
that contains your images using the folder browser, the
images/file names in that folder will display under the
folder tree.
Navigate to
a folder that contains images using the folder browser
directly above the thumbnail grid on the main
window. If the folder browsing panel above the thumbnails
is not visible, you can show the panel by clicking on the bar
labeled "Folders" above
the thumbnail grid. When you have selected a folder
that contains your images using the folder browser, the
images/file names in that folder will display under the
folder tree.- Optional: You can hide the folder browser by clicking
again on the bar labeled "Folders" if you like in order to have more
room for viewing thumbnails.
 Select one or more thumbnails in the
thumbnail grid using the standard Windows multi-select
functions of Ctrl-mouse click or Shift-mouse click.
Select one or more thumbnails in the
thumbnail grid using the standard Windows multi-select
functions of Ctrl-mouse click or Shift-mouse click.- Click "Custom" size in the Print Properties
auto-popup panel.
 Click the
"Borderless" radio button on the left side of
the window.
Click the
"Borderless" radio button on the left side of
the window. Click "OK" and the selected images
will be added using borderless size. If your "OK"
button is grayed out, your print driver is not currently
set up to produce borderless prints. Because all print
drivers implement borderless printing slightly
differently, Qimage cannot set your print driver to
borderless mode automatically. Like setting the paper
size and type, borderless is a driver option that must be
set via the print driver. Use the "click here"
link in the right window panel to open your print driver
properties and select borderless (sometimes called "no
margins") mode in the driver. The "click here"
link will only be visible if Qimage detected that your
driver is not currently set for borderless printing.
Click "OK" and the selected images
will be added using borderless size. If your "OK"
button is grayed out, your print driver is not currently
set up to produce borderless prints. Because all print
drivers implement borderless printing slightly
differently, Qimage cannot set your print driver to
borderless mode automatically. Like setting the paper
size and type, borderless is a driver option that must be
set via the print driver. Use the "click here"
link in the right window panel to open your print driver
properties and select borderless (sometimes called "no
margins") mode in the driver. The "click here"
link will only be visible if Qimage detected that your
driver is not currently set for borderless printing.
Notes: Once you have set your print driver to produce
borderless prints, Qimage will remember the print driver
settings, so you will only need to set the borderless option
in your print driver once and it will remain in effect until
you go back to normal (non-borderless) printing.
Example 2: Printing Multiple Images at
the Same Size (in this example, 4x6 images)
Background: Before beginning with examples, it is
important to understand one important concept in printing,
and that is how to handle print sizes that are different
proportions (aspect ratios) that may/may not match the
proportions of your images. In many of the following examples,
we use the "Auto Cropping" button in the down
position ( ) to give Qimage permission to automatically crop
some of the image to obtain the exact print size chosen.
Qimage may need to crop some of the image, for example, if
you are printing a 6x4 print from a typical consumer camera
that has a 4:3 image which is more "square" than
the print you are printing. If you would like Qimage to print
the entire photo but would like to ensure that the photo
would fit within a 6x4 frame (with some white space if needed),
you may set the "Auto Cropping" button to the up
position (
) to give Qimage permission to automatically crop
some of the image to obtain the exact print size chosen.
Qimage may need to crop some of the image, for example, if
you are printing a 6x4 print from a typical consumer camera
that has a 4:3 image which is more "square" than
the print you are printing. If you would like Qimage to print
the entire photo but would like to ensure that the photo
would fit within a 6x4 frame (with some white space if needed),
you may set the "Auto Cropping" button to the up
position ( ). Here is an example of what you can expect when
printing a 6x4 print from an image captured on a typical
consumer camera with a 4:3 image:
). Here is an example of what you can expect when
printing a 6x4 print from an image captured on a typical
consumer camera with a 4:3 image:
"Fit
in frame": With the "Auto Cropping" button
in the up position, you are telling Qimage that you want
to fit the entire image within the frame size (6x4 in
this example) that you have chosen. In this case, Qimage modifies
the print size and not the image, and you will get a
5.33 x 4 inch print which is the largest possible print
that will fit within a 6x4 frame and still print the
whole image.
"Crop to size": With the "Auto Cropping" button in the down position, you are giving Qimage permission to automatically crop out the center of
the image to obtain a print that is the exact size chosen.
In this case, Qimage modifies the image by
cropping it and leaves the print size alone, and you will
get a 6x4 print cut from the center of the photo. In this
example, the print will cover the entire image left to
right but will have a small portion of the top and bottom
cut off to obtain the proper size.
Note that if the aspect ratio of your image
matches that of the print size chosen, the
"Auto Cropping" button will have no effect on
the prints. For example, most professional cameras use a
3:2 aspect ratio instead of the 4:3 found in most
consumer grade cameras so if you print a 6x4 print from a
pro camera (which is a 3:2 aspect ratio), the "Auto Cropping" button will have no effect on the image and
you will get a 6x4 print regardless of the position of
the "Auto Cropping" button. This is due to the
fact that the entire image will fit in a 6x4 print, so no
cropping is necessary.
 Click the
placement tool button below the preview page and select "Optimal"
placement. This instructs Qimage to arrange images on the
page to minimize paper usage.
Click the
placement tool button below the preview page and select "Optimal"
placement. This instructs Qimage to arrange images on the
page to minimize paper usage. Make sure that the "Image Lock"
button under the preview page is not depressed (unlocked).
This tells Qimage that it is ok to automatically rotate
your images to obtain the best fit inside the frame size.
Make sure that the "Image Lock"
button under the preview page is not depressed (unlocked).
This tells Qimage that it is ok to automatically rotate
your images to obtain the best fit inside the frame size.- Click the "Auto Cropping" button
on the "Print Properties" auto-popup panel below the preview
page. Make sure that the button is depressed/on. This
tells Qimage that it is ok to crop some of your images in
order to obtain exact print sizes.
- Navigate to
a folder that contains images using the folder browser
directly above the thumbnail grid on the main
window. If the folder browsing panel above the thumbnails
is not visible, you can show the panel by clicking on the bar
labeled "Folders" above
the thumbnail grid. When you have selected a folder
that contains your images using the folder browser, the
images/file names in that folder will display under the
folder tree.
- Optional: You can hide the folder browser by clicking
again on the bar labeled "Folders" if you like in order to have more
room for viewing thumbnails.
- Select one or more thumbnails in the
thumbnail grid using the standard Windows multi-select
functions of Ctrl-mouse click or Shift-mouse click.
- Go to the size dropdown in the "Print Properties"
auto-popup panel and select 6x4
(may also be labeled 4x6).
 Click the
"Print" tool button on the top/right of the main window.
Click the
"Print" tool button on the top/right of the main window.
Example 2a: Printing Multiple Images
at the most "compatible" size
Background: Sometimes the actual size of the print is not
important; we just want to pick a common size that best
"fits" the images that we plan to print. We may be
printing images from different sources/cameras that are of
different proportions (aspect ratios) and we are not sure
what "standard" print size best matches those
images. If we can pick a print size that has proportions
similar to our image proportions, we can reduce or eliminate
the need to crop prints. Qimage offers a visual tool that
allows you to determine the most appropriate print size(s)
for images that you select before you even add them
to the queue!
- Navigate to
a folder that contains images using the folder browser
directly above the thumbnail grid on the main
window. If the folder browsing panel above the thumbnails
is not visible, you can show the panel by clicking on the bar
labeled "Folders" above
the thumbnail grid. When you have selected a folder
that contains your images using the folder browser, the
images/file names in that folder will display under the
folder tree.
- Optional: You can hide the folder browser by clicking
again on the bar labeled "Folders" if you like in order to have more
room for viewing thumbnails.
-
 Select one or more thumbnails in the
thumbnail grid using the standard Windows multi-select
functions of Ctrl-mouse click or Shift-mouse click.
Select one or more thumbnails in the
thumbnail grid using the standard Windows multi-select
functions of Ctrl-mouse click or Shift-mouse click.
- Go to the size dropdown on the "Print Properties" auto-popup panel.
The [text] color of the standard print sizes on the
list will
change to indicate which print sizes are the best match
for the selected images. The following outlines the
meaning of the colors of sizes in the list:
Black: Black indicates that the print size is not the
best match for the images you have selected (or you have
not selected any thumbnails in the thumbnail grid).
Blue: Blue indicates that
the print size is an exact match to the
proportions of the selected image(s). Using this size
means that no cropping of the image will be necessary to
obtain this size.
Red: Red indicates
that the print size is not an exact match to the
proportions of the image(s), but is the closest match of
the standard sizes. Using this size will help minimize
cropping to obtain exact sizes but will not completely
eliminate the need to crop some images.
-
Click on one of the highlighted (either blue or red)
sizes to add the selected images at that size.
Example 3: Printing Multiple Images at
Different Sizes (in this example, one 7x5, one 5x3 and one 3x2)
- Click the
placement tool button below the preview page and select "Optimal"
placement. This instructs Qimage to arrange images on the
page to minimize paper usage.
- Make sure that the "Image Lock"
button under the preview page is not depressed (unlocked).
This tells Qimage that it is ok to automatically rotate
your images to obtain the best fit inside the frame size.
- Click the "Auto Cropping" button
on the "Size" tab just below the preview
page. Make sure that the button is depressed/on. This
tells Qimage that it is ok to crop some of your images in
order to obtain exact print sizes.
- Navigate to
a folder that contains images using the folder browser
directly above the thumbnail grid on the main
window. If the folder browsing panel above the thumbnails
is not visible, you can show the panel by clicking on the bar
labeled "Folders" above
the thumbnail grid. When you have selected a folder
that contains your images using the folder browser, the
images/file names in that folder will display under the
folder tree.
- Optional: You can hide the folder browser by clicking
again on the bar labeled "Folders" if you like in order to have more
room for viewing thumbnails.
- Select a thumbnail that you wish to be
printed at a size of 5x7 in the thumbnail grid.
- Go to the size dropdown in the "Print Properties"
auto-popup panel and select 5x7
(may also be labeled 7x5).
- Select a thumbnail that you wish to be
printed at a size of 3x5 in the thumbnail grid.
- Go to the size dropdown in the "Print Properties"
auto-popup panel and select 3x5
(may also be labeled 5x3).
- Select a thumbnail that you wish to be
printed at a size of 3x2 in the thumbnail grid.
- Go to the size dropdown in the "Print Properties"
auto-popup panel and select 3x2
(may also be labeled 2x3).
- Click the
"Print" tool button.
Qimage provides two workflows for adding images of
different sizes:
Select thumbs, add size: In the above
workflow, we select multiple thumbnails and then click a size
to add the selected thumbs at the size chosen.
Select size, add thumbs: In some cases,
it may be desirable to select a default size to work with
first, add images to the queue using that size, switch to the
next size, add the next batch of images at the new size, etc.
Qimage allows this workflow as well. To select a size first (without adding
thumbnails at that size), simply click on white space on the preview page or
right click on the "+" on any thumbnail and then select a new "default" size.
You can then click the small "+" icon on thumbnails to add them to the page. Alternatively, you can select multiple
thumbs, drag them to the preview page, and drop them.
Example 3a: Moving the Crop Area when
"Crop Image" is Turned On (instead of accepting the
default "crop center of photo")
Background: Now that you have had the opportunity to
create a document with various print sizes, you may have
noticed that the automatic crop that is used when the "Auto Cropping" button is down () may not always be
optimal due to the fact that the auto-crop always crops out
the exact center of the image. You may have a photo where the
top of your subject's head is at the very top edge of the
photo for example. In this case, you would want to crop the
image so that only the bottom part of the photo is cropped
rather than a small portion of the top and bottom
which would cut off the top of the subject's head. The
following example illustrates how to adjust the auto-crop in
order to crop an area other than the default (center of image).
- Add images to
the queue with the "Auto Cropping" button set
so that crop is on (button depressed).
- Using the
preview page in the upper right of the main window,
locate a page that contains the print that you would like
to adjust.
 Click the
"Edit Page" button under the preview page or simply double click just outside the page area
next to the preview page to open the full page editor.
This full page editor is the area where you make fine
adjustments to your prints such as freehand movement,
click/drag sizing, crop adjustment, and more.
Click the
"Edit Page" button under the preview page or simply double click just outside the page area
next to the preview page to open the full page editor.
This full page editor is the area where you make fine
adjustments to your prints such as freehand movement,
click/drag sizing, crop adjustment, and more.- When the
page editor opens, click on the "Cropping" tab
on the right side of the window (if not already selected).
- Next, click
the image on the page that you would like to adjust with
respect to cropping.
- The crop is
displayed on the "Cropping" tab on the right.
Move your cursor over the image on the cropping tab and
click/drag to move the image around within the crop
window. When you have finished dragging the image so that
the important parts of the image are visible in the crop
window, simply release the mouse button and your new crop
is instantly in place.
 When
finished, close the page editor window.
When
finished, close the page editor window.
Notes: The cropping tool on the page editor window is a
powerful tool that has additional features other than the
simple click/drag mentioned in the example above where we
were just dragging the photo down in the crop window
to include all of the subject's head in the photo. Here are
some other helpful features you will find in the cropping
tool:
- Red boundary lines: You may notice thin red lines at
the outer edges of the crop window. These lines
indicate that some of the image is being cut off on
those edges. For example, if you add a perfectly
square image at a size of 6x4, you will see red lines
at the top/bottom of the crop window indicating that
the image is being cut on the top/bottom. The red
lines on the top and bottom tell you that there is
room to slide the image up/down in the window but not
left/right. Once you slide the image all the way down,
you reveal all of the top of the image, so you will
have a red line at the bottom only, indicating that
all of the left, right, and top of the image is
showing and only the bottom is cut off.
- Rotate: Sometimes we would like to create a portrait
crop from a landscape image or vice versa.
Checking the "Rotate" box on the cropping
tool will rotate the crop window (unless your print
size is perfectly square) in order to accomplish this
task.
- Apply to all copies of this print: You may have
multiple copies of the same image in the queue, for
example, you may be printing ten copies of the same
photo: eight 4x6 prints and two 3x2 wallets. If you
check "apply to all copies of this print",
Qimage will automatically "carry" your crop
to all other copies of that same image. In the
example where we have eight 4x6 and two 3x2 copies of
the same image in the queue, we could modify the crop
on any of these prints (you do not have to
pick the first one) and that crop would automatically
be copied to the other nine prints, thereby
eliminating the need to identify the same crop on
multiple copies of the same image. Note that the crop
will only be copied to prints that are the same
image and also have the same aspect ratio.
If you had 3.5 x 5 prints of the image in the queue
as well, your crop would not be carried over to these
prints and you would have to modify the crop on the 3.5
x 5 prints separately because the crop will be
different on those due to the fact that 3.5 x 5
prints are a different aspect ratio than 6x4 and 3x2
prints, requiring a separate crop.
- Zoom: The zoom lever defaults to the bottom (no zoom),
resulting in the least amount of cropping. If you
would like to zoom in on an area of your print or get
"tighter" on your subject, you can increase
the zoom lever to zoom in as far as 8x on the photo
and then click/drag to position the zoom.
- Your crops will "stick": Note that once you
move the crop for a print of a certain aspect ratio,
Qimage will remember that crop indefinitely and
automatically! For example, if you add an image to
the queue at a size of 8x10 and then drag the crop to
a certain location for that image, Qimage will honor
that crop any time you add that same image to the
queue in the future using a print size that has the
same aspect ratio (8x10, 4x5, etc.). This is
convenient because it allows you to specify a certain
crop for each print that is a different aspect ratio
and Qimage will remember your crop preference for
that particular aspect ratio! In this example, if you
later wish to print a 4x6, note that Qimage will
default to a center crop for the 4x6 since that size
print is a different aspect ratio. Once you define
the crop you wish to use for the 4x6 size, however,
Qimage will remember that too (and separately from
the 8x10 crop).
Example 3b: Printing Images at their
Original (Scanned) Size
Background: Rather than manually selecting print sizes on
a per-image basis, it is sometimes desirable to be able to
create duplicates of images by printing them at their
original size. Such is the case when photos of different
sizes are scanned in a flatbed scanner and duplicates of
those photos (at the same size as scanned) are desired. The
following procedure describes how to accomplish this task.
- Click the
placement tool button below the preview page and select "Optimal"
placement. This instructs Qimage to arrange images on the
page to minimize paper usage.
- Make sure that the "Image Lock"
button under the preview page is not depressed (unlocked).
This tells Qimage that it is ok to automatically rotate
your images to obtain the best fit inside the frame size.
- Click the "Auto Cropping" button
on the "Size" tab just below the preview
page. Make sure that the button is depressed/on. This
tells Qimage that it is ok to crop some of your images in
order to obtain exact print sizes.
- Navigate to
a folder that contains images using the folder browser
directly above the thumbnail grid on the main
window. If the folder browsing panel above the thumbnails
is not visible, you can show the panel by clicking on the bar
labeled "Folders" above
the thumbnail grid. When you have selected a folder
that contains your images using the folder browser, the
images/file names in that folder will display under the
folder tree.
- Optional: You can hide the folder browser by clicking
again on the bar labeled "Folders" if you like in order to have more
room for viewing thumbnails.
- Select one or more thumbnails in the
thumbnail grid using the standard Windows multi-select
functions of Ctrl-mouse click or Shift-mouse click.
- Click the
size dropdown in the "Print Properties" auto-popup panel and select "Original
Size".
- Click the
"Print" tool button.
Notes: Not all images/image types have a PPI listed in the
file. When Qimage cannot find the PPI parameter in the image
file, it will use the fallback PPI listed on the right window
panel after completing step 8 above. Note that you can also
check the "Override embedded size" checkbox to
override the embedded PPI information in image files and
force PPI to the value listed in the edit box. The override checkbox
can be accessed via selecting the "Custom" print size and then "Original
Size".
Example 3c: Reviewing Images and
Selecting Prints in an Integrated Workflow
- Click the
placement tool button below the preview page and select "Optimal"
placement. This instructs Qimage to arrange images on the
page to minimize paper usage.
- Make sure that the "Image Lock"
button under the preview page is not depressed (unlocked).
This tells Qimage that it is ok to automatically rotate
your images to obtain the best fit inside the frame size.
- Click the "Auto Cropping" button
on the "Size" tab just below the preview
page. Make sure that the button is depressed/on. This
tells Qimage that it is ok to crop some of your images in
order to obtain exact print sizes.
- Navigate to
a folder that contains images using the folder browser
directly above the thumbnail grid on the main
window. If the folder browsing panel above the thumbnails
is not visible, you can show the panel by clicking on the bar
labeled "Folders" above
the thumbnail grid. When you have selected a folder
that contains your images using the folder browser, the
images/file names in that folder will display under the
folder tree.
- Optional: You can hide the folder browser by clicking
again on the bar labeled "Folders" if you like in order to have more
room for viewing thumbnails.
 Right click in the
thumbnail grid and choose
"Select All" to
select all thumbnails in the current folder.
Right click in the
thumbnail grid and choose
"Select All" to
select all thumbnails in the current folder. Right click in the
thumbnail grid and choose
"Preview Selected". The
preview window will open with the first selected
thumbnail.
Right click in the
thumbnail grid and choose
"Preview Selected". The
preview window will open with the first selected
thumbnail.- You may scroll forward/back through the
selected thumbnails using the "Prev" and "Next"
buttons on the preview window. When you see an image that
you would like to print, simply click the "Add" button. The print
currently being reviewed in the preview window will be
added to the queue. Repeat for as many images and
sizes as you like.
- Close the
preview window and your document will now contain the
selected images. When
moving forward through the selected thumbnails, you can
tell when the end of the list is reached because the
"Next" button will be grayed out and will not
be operational.
Example 4:
Printing Many Copies of One Image (in this example, 9 wallets at
3x2 size)
- Click the
placement tool button below the preview page and select "Optimal"
placement. This instructs Qimage to arrange images on the
page to minimize paper usage.
- Make sure that the "Image Lock"
button under the preview page is not depressed (unlocked).
This tells Qimage that it is ok to automatically rotate
your images to obtain the best fit inside the frame size.
- Click the "Auto Cropping" button
on the "Size" tab just below the preview
page. Make sure that the button is depressed/on. This
tells Qimage that it is ok to crop some of your images in
order to obtain exact print sizes.
- Navigate to
a folder that contains images using the folder browser
directly above the thumbnail grid on the main
window. If the folder browsing panel above the thumbnails
is not visible, you can show the panel by clicking on the bar
labeled "Folders" above
the thumbnail grid. When you have selected a folder
that contains your images using the folder browser, the
images/file names in that folder will display under the
folder tree.
- Optional: You can hide the folder browser by clicking
again on the bar labeled "Folders" if you like in order to have more
room for viewing thumbnails.
- Select the thumbnail in question.
 In the "Copies to add"
parameter above the thumbnails, enter "9" as
the number of copies to be added to the queue.
In the "Copies to add"
parameter above the thumbnails, enter "9" as
the number of copies to be added to the queue.- Go to the size dropdown in the "Print Properties"
auto-popup panel and select 3x2
(may also be labeled 2x3).
- Click the
"Print" tool button.
Example 5: Printing a Specified Number
of Prints to Each Page (in this example, dividing the page into 9
prints as large as possible on the page)
- Click the
placement tool button below the preview page and select "Optimal"
placement. This instructs Qimage to arrange images on the
page to minimize paper usage.
- Make sure that the "Image Lock"
button under the preview page is not depressed (unlocked).
This tells Qimage that it is ok to automatically rotate
your images to obtain the best fit inside the frame size.
- Click the "Auto Cropping" button
on the "Size" tab just below the preview
page. Make sure that the button is depressed/on. This
tells Qimage that it is ok to crop some of your images in
order to obtain exact print sizes.
- Navigate to
a folder that contains images using the folder browser
directly above the thumbnail grid on the main
window. If the folder browsing panel above the thumbnails
is not visible, you can show the panel by clicking on the bar
labeled "Folders" above
the thumbnail grid. When you have selected a folder
that contains your images using the folder browser, the
images/file names in that folder will display under the
folder tree.
- Optional: You can hide the folder browser by clicking
again on the bar labeled "Folders" if you like in order to have more
room for viewing thumbnails.
- Select one or more thumbnails in the
thumbnail grid using the standard Windows multi-select
functions of Ctrl-mouse click or Shift-mouse click.
- Click the
size dropdown in the "Print Properties" auto-popup panel and select "Custom".
- Click the
"Enter number of prints per page" radio button
on the left side of the window.
- In the right panel, enter "3" in both the
"columns" and "rows" edit boxes.
- Click "OK" and images will be
added so that 9 prints (3x3) will be on each page.
- Optional: note that since your "last used" size
is remembered, you can click the small "+" icon on thumbnails
to add more thumbnails at the same size without repeating
the above until you have as many prints as you like.
- Click the
"Print" tool button.
Example 6: Printing a Multi Page
Poster of a Single Image (in this example, printing a 2 page by 2
page poster for a total of 4 pages)
- Click the "Auto Cropping" button
on the "Size" tab just below the preview
page. Make sure that the button is depressed/on. This
tells Qimage that it is ok to crop some of your images in
order to obtain exact print sizes. Optional: turn crop
off to ensure that the entire image is printed instead.
- Make sure that the "Image Lock"
button under the preview page is not depressed (unlocked).
This tells Qimage that it is ok to automatically rotate
your images to obtain the best fit inside the frame size.
 Click the
"Landscape" tool button to orient the printed
page in landscape format.
Click the
"Landscape" tool button to orient the printed
page in landscape format.- Navigate to
a folder that contains images using the folder browser
directly above the thumbnail grid on the main
window. If the folder browsing panel above the thumbnails
is not visible, you can show the panel by clicking on the bar
labeled "Folders" above
the thumbnail grid. When you have selected a folder
that contains your images using the folder browser, the
images/file names in that folder will display under the
folder tree.
- Optional: You can hide the folder browser by clicking
again on the bar labeled "Folders" if you like in order to have more
room for viewing thumbnails.
- Select one or more thumbnails in the
thumbnail grid using the standard Windows multi-select
functions of Ctrl-mouse click or Shift-mouse click.
- Click the
size dropdown in the "Print Properties" auto-popup panel and select "Custom".
- Click the
"Enter poster rows/columns" radio button on the
left side of the window.
- In the right panel, enter "2" in both the
"pages across" and "pages down" edit
boxes.
- Click "OK" and image(s) will be
added as 2x2 page posters.
- Click the
"Print" tool button.
Example 6a: Using the poster feature
to overcome your print driver's maximum page length limitation
Background: Qimage not only overcomes your printer's size
limitations by being able to print a multi-page poster, but
it can also override page length limitations on printers that
support roll/banner paper. For example, your print driver may
have a limit of 44 inches for the length of a "page"
even when you are using roll/banner paper. If you want a
print that is 50 inches in length, you can use this example
to get a single print that is 50 inches in length even though
your printer is limited to pages of 44 inches or less in
length. Note that this example only applies to print drivers
that have a "roll" or "banner" option for
the paper feed. If your print driver does not have either of
these options, it will not be possible to overcome your
printer's page length limitation without cutting/pasting two
pages together as would be done in example 6.
- Click the
"Printer Setup" tool button and select "roll paper"
and also select "banner" if that option is available for the paper source in your print
driver. Set the page width to maximum (the width of the
roll) unless you do not want to use the entire width, and
set the page height to your driver's maximum allowable
size.
- Make sure that the "Image Lock"
button under the preview page is not depressed (unlocked).
This tells Qimage that it is ok to automatically rotate
your images to obtain the best fit inside the frame size.
 Click the
"Portrait" tool button to orient the printed
page in portrait format.
Click the
"Portrait" tool button to orient the printed
page in portrait format. Click the
placement tool button below the preview page and select "Center"
placement. It is best to use "Center" placement when printing posters.
Click the
placement tool button below the preview page and select "Center"
placement. It is best to use "Center" placement when printing posters.- Navigate to
a folder that contains images using the folder browser
directly above the thumbnail grid on the main
window. If the folder browsing panel above the thumbnails
is not visible, you can show the panel by clicking on the bar
labeled "Folders" above
the thumbnail grid. When you have selected a folder
that contains your images using the folder browser, the
images/file names in that folder will display under the
folder tree.
- Optional: You can hide the folder browser by clicking
again on the bar labeled "Folders" if you like in order to have more
room for viewing thumbnails.
- Select a thumbnail in the thumbnail grid.
- Click the
size dropdown in the "Print Properties" auto-popup panel and select "Custom".
- Click the
"Enter Specific Size" radio button on the left
side of the window.
- Enter the desired print size (for example 13 x 50 inches)
and click "OK" on the custom size window.
- Qimage will warn you that the size selected is larger
than one page and will ask if you really want the print
to span multiple pages. Answer "Yes".
- Click the
"Print" tool button.
Qimage will print a "poster" that is 1x2 in size
(one page wide and two pages tall). Since you selected "roll"
or "banner" paper in the print driver, when Qimage
gets to the bottom of the first page and starts printing the
second page, there will be no break in the print because
there is no "page eject" command when using roll
paper. The result is one continuous print at the size
selected. In the example where the print driver is limited to
a 44 inch page length and you print a 13 x 50 print, Qimage
will print the first 13x44 inch page followed by a 13x6 inch
page. Since both of these "pages" are printed on a
continuous roll, there is no break and the result is a
continuous 13x50 inch print.
Example 7: Printing a Contact Sheet of
Small Images that Includes the File Name Under Each Print
- Click the
"Landscape" tool button at the top of the
Qimage window to orient the printed page in landscape
format.
- Navigate to
a folder that contains images using the folder browser
directly above the thumbnail grid on the main
window. If the folder browsing panel above the thumbnails
is not visible, you can show the panel by clicking on the bar
labeled "Folders" above
the thumbnail grid. When you have selected a folder
that contains your images using the folder browser, the
images/file names in that folder will display under the
folder tree.
- Optional: You can hide the folder browser by clicking
again on the bar labeled "Folders" if you like in order to have more
room for viewing thumbnails.
- Select one or more thumbnails in the
thumbnail grid using the standard Windows multi-select
functions of Ctrl-mouse click or Shift-mouse click.
- Click the
size dropdown in the "Print Properties" auto-popup panel and select "Custom".
- Click the
"Contact sheet w/info" radio button on the left
side of the window.
- In the right panel, enter "16" at the right in
the "per page" entry. This will split the page
into 4 rows and 4 columns.
- Click "OK" and image(s) will be
added to the queue.
- Click the
"Print" tool button.
Example 7a: Printing a Professional
Contact Sheet of Small Images that Includes image and EXIF info
- Navigate to
a folder that contains images using the folder browser
directly above the thumbnail grid on the main
window. If the folder browsing panel above the thumbnails
is not visible, you can show the panel by clicking on the bar
labeled "Folders" above
the thumbnail grid. When you have selected a folder
that contains your images using the folder browser, the
images/file names in that folder will display under the
folder tree.
- Optional: You can hide the folder browser by clicking
again on the bar labeled "Folders" if you like in order to have more
room for viewing thumbnails.
- Select one or more thumbnails in the
thumbnail grid using the standard Windows multi-select
functions of Ctrl-mouse click or Shift-mouse click.
- Click the
size dropdown in the "Print Properties" auto-popup panel and select "Custom".
- Click the
"Layout: predefined page set" radio button on
the left side of the window.
- Click "OK" and on the subsequent
file-open dialog, select and open the file: "contact-sheet-25-up".
All selected thumbnails will be loaded onto the contact
sheet. Note that remaining/unused positions on the page
set will not be printed.
- Click the
"Print" tool button.
Example 7b: Printing a Package of
Predefined Sizes for all Selected Images (in this case three 4x6
and one 3x2 print)
- Click the
size dropdown in the "Print Properties" auto-popup panel and select "Custom".
- Click the
"Layout: predefined page set" radio button on
the left side of the window.
- Click "OK" and on the subsequent
file-open dialog, select and open the file: "4x6 (3),
3x2 (1)".
- Templates will appear; note that there are four templates
on the preview page.
- Enter the number "4" in the "Copies"
edit box above the thumbnails.
- Navigate to
a folder that contains images using the folder browser
directly above the thumbnail grid on the main
window. If the folder browsing panel above the thumbnails
is not visible, you can show the panel by clicking on the bar
labeled "Folders" above
the thumbnail grid. When you have selected a folder
that contains your images using the folder browser, the
images/file names in that folder will display under the
folder tree.
- Optional: You can hide the folder browser by clicking
again on the bar labeled "Folders" if you like in order to have more
room for viewing thumbnails.
- Select one or more thumbnails in the
thumbnail grid using the standard Windows multi-select
functions of Ctrl-mouse click or Shift-mouse click.
- Right click in the thumbnail grid and select
"Add to Queue". Each selected thumbnail will
fill all four templates on each page, resulting in
packages of three 4x6 and one 3x2 prints of each selected
thumbnail.
- Click the
"Print" tool button.
Example 7c: Printing Order Sheets and
Fulfilling Customer Orders
It is important to start this example with your paper size
(set via "File", "Printer Setup") set to
8.5 x 11.
- Navigate to
a folder that contains images using the folder browser
directly above the thumbnail grid on the main
window. If the folder browsing panel above the thumbnails
is not visible, you can show the panel by clicking on the bar
labeled "Folders" above
the thumbnail grid. When you have selected a folder
that contains your images using the folder browser, the
images/file names in that folder will display under the
folder tree.
- Optional: You can hide the folder browser by clicking
again on the bar labeled "Folders" if you like in order to have more
room for viewing thumbnails.
- Select one or more thumbnails in the
thumbnail grid using the standard Windows multi-select
functions of Ctrl-mouse click or Shift-mouse click.
- Click the
size dropdown in the "Print Properties" auto-popup panel and select "Custom".
- Click the
"Layout: predefined page set" radio button on
the left side of the window.
- Click "OK" and on the subsequent
file-open dialog, select and open the file: "order-sheet-16-up".
All selected thumbnails will be loaded onto the contact
sheet. Note that remaining/unused positions on the page
set will not be printed.
 Click the
"Save" tool button from the top toolbar. On the save dialog,
select "Job" at the bottom of the dialog and enter a file name
like "john-doe-order-sheet" and click "Save"
to save.
Click the
"Save" tool button from the top toolbar. On the save dialog,
select "Job" at the bottom of the dialog and enter a file name
like "john-doe-order-sheet" and click "Save"
to save.- Click the
"Print" tool button.
- Give the order sheets to your customer and ask them to
mark the prints/sizes that they want printed in final
form.
 Click the
"Recall" tool button, select "Job" as the file type at the
bottom of the window, and select/open the
file that you saved in step 7 above. When the job
loads, your preview pages in Qimage will look just like
the order sheet pages that were marked up by your
customer.
Click the
"Recall" tool button, select "Job" as the file type at the
bottom of the window, and select/open the
file that you saved in step 7 above. When the job
loads, your preview pages in Qimage will look just like
the order sheet pages that were marked up by your
customer.- Matching the pages/page numbers in Qimage to
the mark-ups of the printed order sheet pages, use the
preview page on the Qimage main window to click and
select all the prints that were marked by the customer.
Use the standard Windows Ctrl-click as you go to mark/highlight
multiple images on the pages. Note that if you have the
"EXIF Hotbar" enabled, the status bar at the
bottom of the main window will indicate the print number
as you move the mouse across the preview page and "point
at" different prints, so you can also match prints
by print number.
- Once the desired prints have been selected,
right click on the preview page and select "New
Session w/Selected".
After performing the above steps, the queue will contain
all the images marked on the order sheets. Since the images
will still be 2.0 x 1.5 inches in size, you can change the
size of images in the queue accordingly. For example, right
click on the preview page and select "Select All"
and then click the 4x6 size button to change the print size
from 2.0 x 1.5 to 4x6. If the customer marked different sizes,
simply highlight the prints one at a time (or multi-select)
and click the size button corresponding to the ordered size.
Also note that you can quickly and easily increase the number
of copies for certain prints by highlighting the desired
print on the preview page and then right clicking and
selecting "Add Another Copy of this Image".
Example 8: Printing a Text Annotation
Under Prints
- Create a document that contains prints using any of the
methods described above. Using "Center Placement"
is recommended.
 Using the
arrows under the page preview on the main window, locate
the page that contains the image(s) you want to annotate.
Using the
arrows under the page preview on the main window, locate
the page that contains the image(s) you want to annotate.- Click the
"Edit Page" tool button.
- When the
page editor opens, right click on the image you would
like to annotate.
- Select
"Text Annotation" from the drop down menu.
- Enter your annotation in the text box provided and click
"Ok".
- Repeat for other prints if you like.
- Close the
page editor and return to the main window for printing.
Note: you are not limited to the above single line text
annotation. When using the page editor, you may also right
click on prints and add "Floating Text" using a
number of text styles. The text may be placed anywhere on the
page, including on top of existing prints. See
Floating Text for more info.
Example 9: Creating a Layout that
Specifies Custom Image Sizes/Locations (in this example, one 4x6
and four 3x2 prints)
- Click the
placement tool button below the preview page and select "Center"
placement.
- Click the "Auto Cropping" button
on the "Size" tab just below the preview
page. Make sure that the button is depressed/on. This
tells Qimage that it is ok to crop some of your images in
order to obtain exact print sizes.
- Make sure that the "Image Lock"
button under the preview page is not depressed (unlocked).
This tells Qimage that it is ok to automatically rotate
your images to obtain the best fit inside the frame size.
- Click the
"Portrait" tool button to orient the printed
page in portrait format.
- Scroll to
the bottom of the thumbnails displayed (if any) until you
see the last (blank) entry that says "[Template]".
Click once to select the [Template] thumbnail.
- Go to the size dropdown in the "Print Properties"
auto-popup panel and select 4x6
(may also be labeled 6x4).
- In the "Copies to add" box above the thumbnails, enter "4".
- Go to the size dropdown in the "Print Properties"
auto-popup panel and select 3x2
(may also be labeled 2x3).
- To
customize the size and locations of your 5 templates,
click the "Edit Page" tool button. When the
page editor opens, simply click and drag the middle of
prints to move them and the corners to resize in the
usual Windows move/size fashion.
- Close the
page editor and return to the main window.
 Make sure
"Freehand" placement is selected using the tool button under
the preview page. This disables the auto-arrange
feature so that each page appears exactly as designed.
Make sure
"Freehand" placement is selected using the tool button under
the preview page. This disables the auto-arrange
feature so that each page appears exactly as designed.- Click the
"Save" tool button from the top tool bar and then select
"Layout" from the save dialog. Enter a file
name and click "Save" to save the layout.
- You have now saved this custom 5 print template to a file
that can be loaded/used later. See the next example to
learn how to load/use the template that you created.
To load the custom template in the future: choose "Custom"
as your size in the "Print Properties" auto-popup panel and then select "Layout:
predefined page set", click "OK" and select
the filename used in step 12 above.
Example 10: Printing Using Custom
Templates Created in Example 9
- Click the
size dropdown in the "Print Properties" auto-popup panel and select "Custom".
- Select
"Layout: predefined page set" and then click
"OK".
- Select the
file name that you used in example 9 when you created/saved
the custom template. Click "Open" or double
click on the file name and the Custom Layout will appear
as it did when you created it.
- Navigate to
a folder that contains images using the folder browser
directly above the thumbnail grid on the main
window. If the folder browsing panel above the thumbnails
is not visible, you can show the panel by clicking on the bar
labeled "Folders" above
the thumbnail grid. When you have selected a folder
that contains your images using the folder browser, the
images/file names in that folder will display under the
folder tree.
- Optional: You can hide the folder browser by clicking
again on the bar labeled "Folders" if you like in order to have more
room for viewing thumbnails.
- Click the small "+" on thumbnails to fill the
templates one at a time or multi-select thumbnails and
click the add "+" button above the thumbnail
grid.
- Click the
"Print" tool button.
Note: you can set "Copies" above the thumbnail
grid to the number of prints on the page if you want to fill
each page with the same image. For example, set "Copies"
to 5 and each time you double click on a thumbnail, the
entire page of 5 templates will be filled with one image,
creating a photo "package" for each thumbnail.
Example 7b above gives more detail on how to use packages.
Example 11: Creating a Single Multi-Purpose
Crop that Works for Multiple Print Sizes (in this example, a 5x7,
4x6, and 3.5x5 print)
Notes: In example 3a above, we show how to adjust the crop
on each print separately. Qimage also offers the
ability to crop the image itself in such a way that
cropping individual prints is not necessary. Understand that
creating a crop on the image itself places a crop filter on
the image so that parts of the image are discarded for all
operations including printing, slide shows, etc. until the
crop filter is removed. We may want to crop portions of the
image to exclude unwanted details or in order to print many
copies of the same image at different sizes (and aspect
ratios) when we do not want to "decide" on the
cropping of each individual print as we did in example 3a
above. The following example explains how to create an image
crop that can be carried over to multiple print sizes.
- First, add the image to the page by
clicking the small "+" on the thumbnail or highlighting the
thumbnail and clicking a print size.
- Next, double click on the image on the
preview page to open that image in the image editor.
 Next, click the "Crop Wizard"
button on the right side of the window.
Next, click the "Crop Wizard"
button on the right side of the window. Check the
print sizes that you plan to use when you print this
image in the future. In this case, we select the 5x7, 4x6,
and 3.5x5 boxes because we know that these are the print
sizes we are interested in.
Check the
print sizes that you plan to use when you print this
image in the future. In this case, we select the 5x7, 4x6,
and 3.5x5 boxes because we know that these are the print
sizes we are interested in.- Next, tell
the wizard whether a portrait (taller than wide) or
landscape (wider than tall) crop is more appropriate for
the photo. This decision can be made by looking at the
image in the background. Looking at the image displayed
behind the Crop Wizard window, does a wide crop include
more of your subject(s) or does a tall crop best fit the
subject(s)? If a wide crop would better suit the photo (which
would be the case with a group photo for example), select
landscape. If a portait crop best fits the subject in the
frame (which would be the case with a single subject
standing upright in the photo), select portrait.
- Finally,
tell the wizard what edges of the photo are more
important (to preserve). For example, looking at the
photo in the background, if your subject is right-side-up
with his/her head toward the top of the photo, the top/bottom
edges are the most important because you don't want the
subject's head to be "chopped off" in the photo.
In that photo, what appears to the left/right is probably
less important. In this case, you would choose top/bottom
since that is the part of the photo that must not be
cropped off.
 Now click the "Use the recommended crop
ratio" button.
Now click the "Use the recommended crop
ratio" button.- When you are returned to the image editor
the largest possible crop that suits the conditions
defined in the wizard will already be in place. You may
move this crop window by sliding the window, resize the
crop area to crop a smaller portion of the image by
dragging its corners, etc. Qimage will keep the cropped
area locked at the appropriate proportions. Make sure
that your final crop selection includes all of your
subject(s).
 After the
crop has been placed, click the "Done" button
on the lower right side of the window. This will close
the image editor window and return you to the main window
of Qimage.
After the
crop has been placed, click the "Done" button
on the lower right side of the window. This will close
the image editor window and return you to the main window
of Qimage.
Notes: After performing the above steps, your image is now
ready to be printed at the sizes you selected in the Crop
Wizard. From this point forward, you need not worry about
what size prints you are creating and how those sizes will
affect your print cropping (as long as you only create prints
at the sizes you selected in the wizard). Simply add the
image at various sizes (with a process similar to example 3)
and Qimage will always ensure that the important parts of
your image are not cropped off, while giving you the exact
sizes chosen.
Example 12: Downsizing Images for Web/E-mail
Option 1: use option 1 when you simply want to send a few images from
the current folder via e-mail
- Select one or more thumbnails in the thumbnail grid by
clicking on the image(s) with your left mouse button (use the Ctrl and Shift
keys to multi-select in the standard Windows fashion).
- Right click in the thumbnail grid and select "Send via
Email".
- Click one of the size (resolution) buttons.
- New (e-mail ready) images will be saved in a folder named {Q}e-mail under
the current folder, and your e-mail client will open with the images attached
to a new message. Simply type your message in the message body and click
"Send". If your e-mail client is not MAPI compliant or will not accept
attachments due to an e-mail client error, an e-mail message will be opened
along with an explorer window showing the files ready to dragged/dropped into
the message manually.
Option 2: use option 2 for more advanced creation of downsampled JPEG
images
- Navigate to
a folder that contains images using the folder browser
directly above the thumbnail grid on the main
window. If the folder browsing panel above the thumbnails
is not visible, you can show the panel by clicking on the bar
labeled "Folders" above
the thumbnail grid. When you have selected a folder
that contains your images using the folder browser, the
images/file names in that folder will display under the
folder tree.
- Optional: You can hide the folder browser by clicking
again on the bar labeled "Folders" if you like in order to have more
room for viewing thumbnails.
- Use the "+" on each thumbnail to add thumbnails one at a time to
add to the queue, or multi-select thumbnails and then
right click in the thumbnail grid and select "Add to
Queue".
 Right click on the preview
page and select
"Create e-mail/web size copies" from the menu.
Right click on the preview
page and select
"Create e-mail/web size copies" from the menu.- The default
resize it a 640x480 resize. If you would like a different
resolution, simply enter the resolution or click the
appropriate resolution button.
 Click the
"Go!" button. Progress will be displayed at the
bottom of the window. Click "Cancel" once
to stop processing if you need to abort the procedure.
Click the
"Go!" button. Progress will be displayed at the
bottom of the window. Click "Cancel" once
to stop processing if you need to abort the procedure.- When processing is complete, you will be returned to the
main window. The downsized versions of your images will
be in a new folder named {Q}e-mail below the current folder. Note
that this {Q}e-mail folder should be considered a "temporary" folder so if
you would like to keep the created files (as opposed to a one-time
e-mailing), you should copy/move the created files from the {Q}e-mail folder
to another folder.
- If you have the "Send via mail client when
done" box checked, a new mail message will appear
with the images already attached. Simply fill in the
"To" field to specify the recipient of the
e-mail and click "Send" to send the pictures via
e-mail. See the help on "Create
e-mail/web copies" for more info on invoking your
mail client.
Note: E-mail/web copies are always saved in JPEG format. If
the aspect ratio of the images does not match that of the
selected size, the image will be fitted into the given size
such that the entire image is visible. When making e-mail/web
copies of images that are different aspect ratios or are in a
different orientation, Qimage will match one side and
calculate the other. Note that all e-mail/web copies are saved
with the proper ICC profile embedded so that the images can
be viewed accurately should anyone wish to view the image
outside the realm of e-mail/web using ICC aware software.
Example 12a: Upsampling Images to
Increase Resolution
Notes: This example shows how to resample images to
achieve higher resolution images. If you want to resample
images for the purpose of preparing prints for another
printing service (such as an online printing service), use example 25a instead since that example is
geared toward preparing pages to print. This example simply
illustrates how to increase image resolution without making
other changes to the image(s).
- Navigate to
a folder that contains images using the folder browser
directly above the thumbnail grid on the main
window. If the folder browsing panel above the thumbnails
is not visible, you can show the panel by clicking on the bar
labeled "Folders" above
the thumbnail grid. When you have selected a folder
that contains your images using the folder browser, the
images/file names in that folder will display under the
folder tree.
- Optional: You can hide the folder browser by clicking
again on the bar labeled "Folders" if you like in order to have more
room for viewing thumbnails.
- Use the "+" button on each thumbnail to add to the queue, or multi-select thumbnails and then
right click in the thumbnail grid and select "Add to
Queue". Note that if you plan to resample multiple
images in batch, it is best to try to select images that
are the same size (resolution). For example, select
several 2048 x 1536 images that you would like to
resample to 3000 x 2250.
 Double click
on an image on the preview page in the upper/right of the
main window to bring that particular image into the image editor.
Double click
on an image on the preview page in the upper/right of the
main window to bring that particular image into the image editor.- Note that the resolution of the image currently being
displayed is listed on the lower/right of the image editor window under "Resolution".
- Simply
enter the new/desired resolution in the "Resolution"
entry. For example, if your original image is 2048 x 1536
and you overwrite the 2048 with "3000", the
resolution will automatically update to 3000 x 2250 (this
is based on the dimensions of the original image).
- You may
click the "I" button next to the resolution
values to change the interpolation method used for the
resampling.
- At this
point, you have two choices for saving the upsampled/interpolated
image(s). You can click "File", "Save As"
from the menu if you would like to save the current image
with a different name. When the image is saved, it will
be interpolated to the resolution entered above. You can
also click the "Done" button and when the
filter application window appears, click "Create New
Images" and select the file format for the new/interpolated
images (JPG, TIF, etc). Click "Apply the filter to
all images in the queue" at the top of the window if
you would like upsampled copies of every image currently
in the view/print queue, otherwise only the current image
is processed. If you choose this second method of
applying the interpolation to images in the queue, the
interpolated copies of the images will appear in the same
folder as your originals with a {Q} prefix on the file
name unless you specify otherwise on the filter
application window prior to clicking OK to process the
images.
Example 13: Converting Images (in
this example, Nikon D1 NEF Images to TIF) - not available in Lite edition
- Navigate to
a folder that contains images using the folder browser
directly above the thumbnail grid on the main
window. If the folder browsing panel above the thumbnails
is not visible, you can show the panel by clicking on the bar
labeled "Folders" above
the thumbnail grid. When you have selected a folder
that contains your images using the folder browser, the
images/file names in that folder will display under the
folder tree.
- Optional: You can hide the folder browser by clicking
again on the bar labeled "Folders" if you like in order to have more
room for viewing thumbnails.
- Use the "+" button on each thumbnail to add to the queue, or multi-select thumbnails and then
right click in the thumbnail grid and select "Add to
Queue".
- Right click
on the preview page and select "Convert Images".
- Click the
radio button next to "TIF (lossless)".
- Click "Ok"
and Qimage will convert all the images in the queue. The
converted images will be in the same folder(s) as the
original NEF's, but will have a {Q} prefix on the file
names. For example, if pic0001.nef, pic0002.nef and pic0003.nef
are in the queue and you told Qimage to convert all
images in the queue, you will now have images named {Q}pic0001.tif,
{Q}pic0002.tif, and {Q}pic0003.tif.
Note: Images of any type can be converted to JPG, TIF, BMP,
or GIF files with the above procedure. Simply add images of
any supported file type to the queue (you can mix types) and
use the above procedure, telling Qimage whether you would
like to save the converted images in JPG, TIF, BMP, or GIF
format in step 5 above. All images in the queue will be
converted to the file format specified in step 5.
Example 14: Viewing and Printing
Raw Images
Qimage treats raw images like any other format. There is no need to
develop, convert, or create new images from your raw files. Use, view,
and print your raw photos as you would a JPEG or TIFF.
Section II: Making Changes
Example 15: Changing the Size of
Existing Prints (in this example, changing a 6x4 print to a 3x2
print)
- Let's assume that you have followed Example 2 and have a
number of 4x6 prints appearing on the preview page in the
upper right of the main window.
- First,
select the print that you would like to resize by left
clicking on a print on the preview page (upper right of
main window).
- Go to the size dropdown in the "Print Properties"
auto-popup panel and select 3x2
(may also be labeled 2x3). The size
of the print will change to 3x2.
Example 16: Changing the "Auto Cropping"
setting of Existing Prints (in this example, turning off
"Auto Cropping" on a 6x4 print)
- Let's assume that you have followed Example 2 and have a
number of 4x6 prints appearing on the preview page in the
upper right of the main window. If you followed the
example, you should have 4x6 prints on the page. Unless
you selected images that are a 6:4 aspect ratio, part of
the images will be cropped to achieve the 4x6 size. In
this example, we will remove the cropping and force
Qimage to print the entire image instead.
- Select the
print that you would like to "uncrop" by left
clicking on a print on the preview page (upper right of
main window).
- The Auto Cropping button under the preview
page on the "Print Properties" auto-popup panel should be in the down position indicating that the
selected print has auto-crop turned on.
- Click the
Auto Cropping button and the auto-crop will be released
on the selected print.
- IMPORTANT: If the above steps succeed in removing the
crop and refitting the image, STOP now. If you performed
the above steps and Qimage still shows a cropped image or
you notice that the size did not change by the refitting,
you may have placed an associative crop on the image as
outlined in example 11. If so, there is still a crop
"filter" on the image itself that needs to be
removed. If this is the case, proceed to the next step.
- To remove a
crop that has been placed on the image via an associative
image edit, start by right clicking on the print on the
preview page again to bring up the drop down list of
functions.
 Select
"Delete Filter(s)".
Select
"Delete Filter(s)".- Check the
"Crop" checkbox, indicating your desire to
delete the crop from the image.
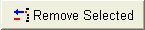 Click
the "Remove Selected" button. The associative
crop will be removed and the entire image restored.
Click
the "Remove Selected" button. The associative
crop will be removed and the entire image restored.
Example 17:
Rotating Existing Prints on the Page
- To
rotate a print on the printed page, first select the
print by left clicking on a print on the preview page.

 Click the
"Rotate Left (CCW)" or "Rotate Right (CW)"
button on the "Print Properties" auto-popup panel to rotate the print 90 degrees counter-clockwise
or clockwise respectively.
Click the
"Rotate Left (CCW)" or "Rotate Right (CW)"
button on the "Print Properties" auto-popup panel to rotate the print 90 degrees counter-clockwise
or clockwise respectively.
Example 17a: Rotating Images so that
the Thumbnails/Images Always Appear Upright When Displayed on
Screen
- Select one or more thumbnails in the
thumbnail grid using the standard Windows multi-select
functions of Ctrl-mouse click or Shift-mouse click. Multi-select
all the thumbnails that need to be rotated in the same
direction.
- Right click in the thumbnail grid and select
"Predefined Filter".
- Select and open "Rotate 90 Clockwise",
"Rotate 90 Counter-clockwise" or "Rotate
180" as appropriate. The images will be rotated by
the specified amount.
Note: applying a filter using "Predefined
Filter" always adds to whatever filters already exist.
For this reason, if you perform the above steps and select
the "Rotate 90 Clockwise" filter and then repeat
the steps, selecting the "Black and White" filter,
you will have thumbnails that are both rotated 90 degrees
clockwise and are now black and white. Also note, however,
that since different "types" of filters can be
added, using the same filter more than once will have no
effect because it will overwrite any existing value for that
filter. For example, "Black and White" and "Brighten"
can be used in combination but selecting "Brighten"
twice will not result in twice the brightening because you
are using the same filter twice.
Section III: Working with ICC Profiles
Example 18: Using ICC Profiles with
Original Images from a Digital Camera (in this example, a Nikon
CP990)
Note: this is a "legacy" example that is typically no longer
necessary.
- Let's assume that you have acquired an ICC profile for
your particular camera model and want to "connect"
that ICC profile in Qimage so that you get the most
accurate color to view/print.
- First,
select "Edit", "Preferences", "Color Management"
from the top menu of the main window. The color
management window will open.
 Initially,
the table of input devices at the top only lists an entry/row
for <unknown device>. This is a "fallback"
line that must always exist in the table. Since we want
to add a new row to the table, click the "Insert"
button first.
Initially,
the table of input devices at the top only lists an entry/row
for <unknown device>. This is a "fallback"
line that must always exist in the table. Since we want
to add a new row to the table, click the "Insert"
button first.- Left click
anywhere in the new/blank row that was inserted into the
table to activate that row.
- Click
"Select ICM Profile" and browse to and select
the profile for your camera. If you purchased the CP990
profile from the Qimage ICC Profile page and followed the
instructions for saving the profile for example, you
would select the file \windows\system\color\cp990.icm.
Once selected, you will notice that the path and filename
were filled in under "ICM Profile" in the table.
- Next,
click "Extract EXIF Model Name" and browse to
and select an *original* image from your camera (in our
example, the CP990). Since this function extracts the
camera name from an image file, the image file you choose
*must* be an unmodified original JPG or TIF downloaded
from the camera's memory card. If you select a modified
image, the EXIF information may have been stripped from
the modified image and may no longer exist. Once you
select an original image, Qimage will extract the EXIF
model name for the camera and will place that name in the
column labeled "EXIF Model" in the table (in
this case, the value will be "E990").
- Make sure that
there is a "Y" in the right column of the table
indicating that the new row is enabled, and then click
"Ok" to save the information in the table and
close the window.
- You have now successfully associated your camera profile
with original images from your camera. From this point
forward, whenever Qimage opens an *original* image from
the CP990 camera, it will know which ICC profile to use.
Note that if the EXIF information is not present, Qimage
will fall back to the profile selected under <unknown
device>. For a method of identifying which profile to
use when your images do not contain the original EXIF
tags, see example 19 below.
- Repeating the above process for different camera models
allows Qimage to "auto assign" the correct
profiles to different camera models automatically so that
you do not have to worry about selecting
which profile goes with which camera.
Example 19: Using ICC Profiles with
Modified Images from a Digital Camera (in this example, a Nikon
CP990)
Note: this is a "legacy" example that is typically no longer
necessary.
- In this case, since we are dealing with modified images,
the EXIF information that contains the camera model may
no longer be present. If the EXIF model name is not
embedded in your image files, the method used to assign a
camera profile in example 18 will not work. Qimage does,
however, provide another method of assigning profiles to
images. We can associate a profile to an image based on
image resolution.
- First,
select "Edit", "Preferences", "Color Management"
from the top menu of the main window. The color
management window will open.
 Initially,
the list of input devices at the top only lists an entry
for <unknown device>. This is a "fallback"
line that must always exist on the list. Since we want to
add a new row to the table, click the "Insert"
button first. If you performed example 18 above, there
will be two lines in the table: one for <unknown
device> and one for "E990". You should leave
the "E990" line in the table. Don't delete or
disable it because you still want Qimage to recognize
your camera's originals.
Initially,
the list of input devices at the top only lists an entry
for <unknown device>. This is a "fallback"
line that must always exist on the list. Since we want to
add a new row to the table, click the "Insert"
button first. If you performed example 18 above, there
will be two lines in the table: one for <unknown
device> and one for "E990". You should leave
the "E990" line in the table. Don't delete or
disable it because you still want Qimage to recognize
your camera's originals.- Left click
anywhere in the new/blank row that was inserted into the
table to activate that row.
 Click
"Select ICM Profile" and browse to and select
the profile for your camera. If you purchased the CP990
profile from the Qimage ICC Profile page and followed the
instructions for saving the profile for example, you
would select the file \windows\system\color\cp990.icm.
Once selected, you will notice that the path and filename
were filled in under "ICM Profile" in the table.
Click
"Select ICM Profile" and browse to and select
the profile for your camera. If you purchased the CP990
profile from the Qimage ICC Profile page and followed the
instructions for saving the profile for example, you
would select the file \windows\system\color\cp990.icm.
Once selected, you will notice that the path and filename
were filled in under "ICM Profile" in the table.- Click in
the "X Res." column and enter 2048.
- Click in
the "Y Res." column and enter 1536.
- Note: leave the "EXIF Model" column blank.
- Make sure that
there is a "Y" in the right column of the table
indicating that the new row is enabled, and then click
"Ok" to save the information in the table and
close the window.
- The above steps will cause Qimage to use the "cp990.icm"
profile on every image that is 2048 x 1536 resolution.
Obviously, this method will only work on uncropped images
since it is based on the resolution of a full size Nikon
CP990 image. Also, if you have another camera (or other
images from another digital camera) that are exactly the
same resolution (for example, the Olympus C3030Z), Qimage
will place the Nikon 990 profile on those images as well
because they are the same resolution.
- What if you don't know the resolution of images from your
camera? Simply go back to the main window and hold the
mouse pointer over an image from that camera and watch
the status bar at the very bottom of the window. The
resolution will be displayed there.
Final note: As an alternative to using Qimage's input
table to associate ICC profiles with image types/resolutions,
you can also embed the proper profile into JPEG/TIFF images
saved by Qimage up front. By embedding the ICC profile into
the JPEG/TIFF itself, you can specify exactly what profile is
to be used with that image in the future, thus eliminating
the need for Qimage to look in it's input table. See Example 26 for more details.
Example 20: Identifying Which Monitor
and Printer Profile to Use
- Although typically Qimage will know which color space (profile) belongs
to your images, if it does not
know what profiles to use for your monitor and
printer, there is no way to "convert" the
color space from one device to another. A simple analogy
would be telling someone, "Go north on Route 95
until you get there" without telling the person
where "there" is. Knowing that we cannot
profile from a known space to "nothing", we
need to take the following steps to identify what color
space our devices use.
- First,
select "Edit", "Preferences", "Color Management"
from the top menu of the main window. The color
management window will open.
- Check the box that says
"Enabled" under the "Monitor" tab.
 Click the
selection button in the "Monitor" group. If you
have a specific profile that describes your specific
brand/model monitor, browse to and select that profile (ICM
file). On most systems, these profiles are stored in the
\windows\system\color folder. If you do not have a
specific profile, browse to the folder where Qimage is
installed (normally \program files\qimage) and select
"sRGB.icm". sRGB should be good enough for most
generic monitors.
Click the
selection button in the "Monitor" group. If you
have a specific profile that describes your specific
brand/model monitor, browse to and select that profile (ICM
file). On most systems, these profiles are stored in the
\windows\system\color folder. If you do not have a
specific profile, browse to the folder where Qimage is
installed (normally \program files\qimage) and select
"sRGB.icm". sRGB should be good enough for most
generic monitors.- Next, check
the box that says "Enabled" under the "Printer"
tab.
- Click the
selection button in the "Printer" group. If you
have a specific profile that describes your specific
brand/model printer and the paper/media you are using (perhaps
you created one yourself with a profiling tool), browse
to and select that profile (ICM file). If you do not have
a specific profile, browse to the folder where Qimage is
installed (normally \program files\qimage) and select
"sRGB.icm". IMPORTANT: the sRGB profile was NOT
designed for printers and results of using sRGB color
space on a printer may vary depending on whether or not
the printer is designed to accept sRGB data by default,
etc. For this reason, selecting sRGB as the color space
used for your printer is not "industry"
practice nor is it recommended. It may, however, be
better than not using a printer profile at all, in which
case the raw data from your camera will simply be "dumped"
to the printer. For truly accurate color, we recommend
obtaining a specific profile for your printer/media/ink
combination or developing a profile yourself using a
custom profiling tool.
- Click "Ok"
to close the color management window and return to the
main window.
- If you followed this example and have selected appropriate monitor and
printer profiles, you have now
activated color management in Qimage and your images will
automatically be profiled for view/print.
Example 21: Verifying that the Proper
ICC Profile is Being Used for your Camera
Note: this is a "legacy" example that is typically no longer
necessary.
- In examples 18 through 20, we have given Qimage a method
of specifying how color data is described in images saved
by your camera, and how to "translate" that
data to the specifications of your monitor and printer.
To run a simple test to verify that the correct profile(s)
are getting selected for the correct camera(s), perform
the following steps.
- First, visually inspect the lower right panel on the main
window (Print Processing) and make sure that there is a
"Printer ICC" identified. A profile name should
appear and NOT the word "OFF".
- Navigate to
a folder that contains images using the folder browser
directly above the thumbnail grid on the main
window. If the folder browsing panel above the thumbnails
is not visible, you can show the panel by clicking on the bar
labeled "Folders" above
the thumbnail grid. When you have selected a folder
that contains your images using the folder browser, the
images/file names in that folder will display under the
folder tree.
- Optional: You can hide the folder browser by clicking
again on the bar labeled "Folders" if you like in order to have more
room for viewing thumbnails.
- Double click on a thumbnail. The image will
be added to the queue and one line will appear in the
queue.
- If your association in example 18 and/or 19 is
functioning properly, the profile for that camera should
appear at the end (right side) of the line in the queue.
To continue with example 18 and the Nikon CP990 camera,
you should see "cp990.icm" listed on the very
right of the line in the queue.
Example 22: Using a Camera Profile to
Profile Images for the Web
Note: this is a "legacy" example that is typically no longer
necessary.
- In examples 18 through 21, we have been concerned with
how produce accurate color within the Qimage
application. Although the above will ensure that Qimage
always produces accurate displays/prints, we may need to
profile originals from our camera so that other programs
display them properly or so that they appear on the web
with accurate color using generic browsers/monitors. If
you make changes to, or filter images in Qimage, resaving
the filtered images as new images using a process similar
to example 12, the newly created/filtered images are not
automatically profiled. That is, your camera profile is
not used. This is because by simply creating modified
images, we have not yet identified what medium they will
be viewed or printed on. To use a camera profile to
profile your images for web display, follow these steps.
- Navigate to
a folder that contains images using the folder browser
directly above the thumbnail grid on the main
window. If the folder browsing panel above the thumbnails
is not visible, you can show the panel by clicking on the bar
labeled "Folders" above
the thumbnail grid. When you have selected a folder
that contains your images using the folder browser, the
images/file names in that folder will display under the
folder tree.
- Optional: You can hide the folder browser by clicking
again on the bar labeled "Folders" if you like in order to have more
room for viewing thumbnails.
- Use the "+" button on each thumbnail to add to the queue, or multi-select thumbnails and then
right click in the thumbnail grid and select "Add to
Queue".
- Right click
on the preview page and select "Convert Images".
- Leave the
"JPG" radio button selected.
- Check the
box that says "Perform a Profile to Profile (ICM)
Conversion".
- Click the
selection button next to the "From" profile and
select the profile for your camera. In the CP990 example
from above, that would be "cp990.icm".
- Click the
selection button next to the "To" profile and
select sRGB.icm. The sRGB space is located in the folder
where you have Qimage installed (normally \program files\qimage).
- Click "Ok"
and Qimage will convert all the images in the queue. The
converted images will be in the same folder(s) as the
originals, but will have a {Q} prefix on the file names.
For example, if pic0001.jpg, pic0002.jpg and pic0003.jpg
are in the queue and you told Qimage to convert all
images in the queue, you will now have images named {Q}pic0001.jpg,
{Q}pic0002.jpg, and {Q}pic0003.jpg.
- Note that you can downsize images for the web (example 12),
and profile them at the same time! To do this, simply
follow the above example and between steps 6 and 7, check
the radio button for "Add to/replace existing
filters". When the filter dialog appears, enter
"640" in the width under "Resolution"
at the bottom of the filter window and click "Done".
This operation will insert a 640 resize filter into the
above process so that resulting images are downsized and
profiled accordingly. Note that if you are working with
images with different resolutions, Qimage performs a
relative downsizing (downsizing all images by the same
percentage), unlike the absolute resizing in example 12.
As a result, the final resolution using this resizing
method may vary depending on the resolution of the
originals.
Example 23: How to Avoid "Double
Profiling"
The latest versions of Qimage have made double profiling a thing of the
past in most cases. The only way to get into trouble with double
profiling is to activate a printer profile in Qimage's color management
settings while also activating the "ICM" mode in the print driver.
Having ICC profiles turned on in both the print driver and Qimage can, in
some cases, cause double profiling that can result in oversaturated colors.
To avoid double profiling, simply ensure that ICC profiles (or the "ICM"
option) is only activated in Qimage or the driver, not both.
Example 24: Creating a Scrapbook Page
- After deciding on which images to print and their
approximate sizes, follow an example such as Example
3 to add the images to the document with one
IMPORTANT exception: when following example 3, you should
make sure that the "Auto Cropping" button in
step 2 is off instead of on (button up/not depressed).
Auto cropping of prints can interfere with the print
rotation in step 6 below. When finished, each page should
contain the images that you would like to be printed on
that page.
- Using the
preview page on the main window, go to a page that you
would like to arrange and double click on one of the
prints to bring that print into the image editor. Let's
assume you clicked on a print that you would like on the
upper left corner of the page.
 Click the
"Cutout" button located under "Image
Effects" in the filter parameters on the right.
Click the
"Cutout" button located under "Image
Effects" in the filter parameters on the right. Click the
small picture icon at the top of the cutout preview
window. This will refresh all the cutout thumbnails.
Click the
small picture icon at the top of the cutout preview
window. This will refresh all the cutout thumbnails.- Double
click on a cutout icon such as "Ripples". You
will be returned to the image editor with the cutout
previewed on screen.
 In the
"Rotate" parameter just above the "Cutout"
button, enter a rotation of -45. This will rotate the
print 45 degrees counter-clockwise on the page (the
rotation cannot be previewed in the image editor).
In the
"Rotate" parameter just above the "Cutout"
button, enter a rotation of -45. This will rotate the
print 45 degrees counter-clockwise on the page (the
rotation cannot be previewed in the image editor).- Click the
"Done" button on the far right side of the
window. This tells Qimage that you are done editing the
filter and you would like to save it and close the filter
window. Note that you have placed an associative filter
on the original image. As a result, any time this image
is viewed, printed, or added to a page, it will have the
same appearance (rotated counter-clockwise with the
"Ripples" cutout to produce rippled edges).
Removing the filter and reverting to the original is
simple, however: select the print on the page or the
thumbnail in the thumbnails window and right click,
selecting "Delete Associative Filter(s)".
- Click "Ok"
to associate the filter with the original image.
- You will now be returned to the main window and the
preview page will update. You can repeat steps 2 through
8 until all your prints have the desired cutouts and
rotation applied. To customize your page by relocating or
moving/resizing prints on the page, see example 25 below.
Note: See the help on Floating Text
to learn how to add text anywhere on the page.
Example 25: Visual/Manual Placement
and Sizing of Images
- Using the
preview page on the main window, locate a page that you
would like to rearrange.
- Click the
"Edit Page" tool button to open the full page
editor.
- Simply
click in the center of any print and drag that print to
the new location on the page.
- Repeat step 3 until all
the images are in the desired locations.
- To change
the size of prints visually, simply click in any corner
and drag that corner to resize in the typical Windows
sizing fashion.
Note: you may also click/drag prints on the small preview page on the
main window but the full page editor as used in example 25 offers higher
precision.
Example 25a: Preparing Pages of
Prints to be Sent to an [Online] Printing Service
Notes: in addition to using Qimage to create professional
quality prints directly to your local or network printer(s),
Qimage can also be used to prepare print "jobs" for
external printing services. You can easily prepare multiple
pages of prints for a printing service using the same built
in professional quality print algorithms. The job is prepared
via saving pages as image files. The workflow for
accomplishing this task is outlined in the steps below.
- From the main Qimage window, click "File",
"Print To" and select "File". This
tells Qimage that you intend to prepare a job for
printing by another service.
- The "Print
to File: Page Definition" dialog will appear, which
will allow you to specify the size and resolution of each
printed page. Enter the appropriate values and click
"OK" to accept. You may update this page
definition at any time by clicking "File",
"Printer Setup". The values that you
should use here depend on the type of equipment being
used by the printing service. A quick call or e-mail to
the printing service where you intend to send your images
should be all that is needed here. For example, many
online printing services request that image files be 8x10
at 300 PPI resolution (this equates to image files that
have a resolution of 3000 x 2400).
- Use Qimage as you normally would, adding and arranging
prints.
- When you are
ready to print, simply click the print button on the top/right
of the main window.
- The "Print
to File" dialog will appear. Here, you can specify
the range of pages to print and the JPEG quality to use (if
you save your files as JPEG files). When you have
specified the range of pages to print, click OK.
- The save dialog
appears, asking for a file name to use when saving each
page. Select the folder and file name for the output and
click OK. If multiple pages are being printed, multiple
files will be created with a numeric suffix such as
MyPageName(0001), MyPageName(0002), etc.
Final note: Note that printing to file(s) is no different
than printing to a printer. The only difference is that when
you print to a file, you are "rerouting" the output
to be stored in files instead of sending the images to the
printer. As such, all printing options are
still valid and may still be used when printing to files:
print interpolation levels and interpolation type, smart
sharpening, and "Printer ICC" profile. If you have
a "Printer ICC" active on the bottom right of the
main window, be aware that all images (of your pages) will be
saved in that color space and that
color space will be embedded in each page file. Some online
printing services specify the color space they would like to
be used for your images (sRGB, Adobe, etc.). When in doubt,
ask your printing service what color space they "assume"
for images so that you can match that in your "Printer
ICC" for the most accurate color. Since Qimage
automatically embeds your "Prtr ICC" profile into
each printed image (page), the print service where you send
your images will easily be able to identify and use the
proper color space when processing your images/pages.
Example 26: How to Create TIFF images
with your Camera's ICC Profile Embedded
Notes: Since ICC profiles are available for some cameras
and in general, cameras do not embed profiles in original
images, it can be beneficial to create copies of images that
have the proper ICC profile embedded. If we take an original
JPEG from a camera for example, and create a TIFF copy of
that with the proper ICC profile embedded in the TIFF, other
photo editors and ICC aware applications can open this TIFF
with accurate color rendition. In addition, Qimage will
recognize this embedded profile when the TIFF image is opened
in the future. To do this, we take original JPEG/TIFF images
from the camera and use Qimage to create TIFF images that
have the proper ICC profile embedded in them. Note that this
does not change the image data
itself! We are just tagging the created TIFF images with the
ICC profile, which is a description of how to interpret the
RGB data in the TIFF file.
- Navigate to
a folder that contains images using the folder browser
directly above the thumbnail grid on the main
window. If the folder browsing panel above the thumbnails
is not visible, you can show the panel by clicking on the bar
labeled "Folders" above
the thumbnail grid. When you have selected a folder
that contains your images using the folder browser, the
images/file names in that folder will display under the
folder tree.
- Optional: You can hide the folder browser by clicking
again on the bar labeled "Folders" if you like in order to have more
room for viewing thumbnails.
- Use the "+" button on each thumbnail to add to the queue, or multi-select thumbnails and then
right click in the thumbnail grid and select "Add to
Queue".
- Right click
on the preview page and select "Convert Images".
- Check the
"TIF" radio button so that new images will be
created in TIF format.
- Click "Ok"
and Qimage will convert all the images in the queue. The
converted images will be in the same folder(s) as the
originals, but will have a {Q} prefix on the file names.
For example, if pic0001.jpg, pic0002.jpg and pic0003.jpg
are in the queue and you told Qimage to convert all
images in the queue, you will now have images named {Q}pic0001.tif,
{Q}pic0002.tif, and {Q}pic0003.tif.
Final note: Qimage can also embed ICC profiles into JPEG
images as well. You can use the above example to create a
JPEG with embedded profile by following the above steps and
simply checking "JPG" in step 5 instead of "TIF".
Example 27:
How to Associate ICC Profiles with Individual Images Using the image editor
Notes: There may be times when you would like to simply
"tag" particular images with an ICC profile without
embedding the actual profile into the images. You can
associate an ICC profile with image(s) by setting the "ICC"
parameter in the image editor. Associating an ICC profile
with an image using the image editor will override all other
methods of identifying an ICC profile for that image (including
the embedded profile if the image has one). Note that since
this method simply associates an ICC profile to images via an
associative filter, it will also allow you to associate ICC
profiles with file types that do not allow embedded profiles
(such as BMP, TGA, and even GIF). The following example shows
how to use Qimage's image editor to associate an ICC profile
with image(s).
- Navigate to
a folder that contains images using the folder browser
directly above the thumbnail grid on the main
window. If the folder browsing panel above the thumbnails
is not visible, you can show the panel by clicking on the bar
labeled "Folders" above
the thumbnail grid. When you have selected a folder
that contains your images using the folder browser, the
images/file names in that folder will display under the
folder tree.
- Optional: You can hide the folder browser by clicking
again on the bar labeled "Folders" if you like in order to have more
room for viewing thumbnails.
- Use the "+" button on each thumbnail to add to the queue, or multi-select thumbnails and then
right click in the thumbnail grid and select "Add to
Queue".
- Now that you
have added the images to the queue that you want to
associate with a particular ICC profile, double click on a print on the
preview page to open the image editor.
- Locate the
"ICC" association in the "Auto Correct"
group on the right side of the window and click the
"Open" button to the right of this entry to
locate/open a profile.
- Browse through the folders on your system
that contain ICC profiles and select a profile by double
clicking on the profile name.
- Close the
image editor window.
 Answer "Yes"
to indicate that you would like to apply the filter on
your way out.
Answer "Yes"
to indicate that you would like to apply the filter on
your way out.- At the top
of the next dialog, under "Scope", tell Qimage
whether you want to associate this ICC profile with the
image you were just editing, or ALL images that you
placed in the queue.
- Click "Ok"
and Qimage will associate the ICC profile with the image(s).
Final note: Please note that the profile selected in step
5 above must be available to Qimage whenever viewing/printing/converting
images. If the selected ICC profile is later deleted or the
filter is used on another system that does not have the same
profile located in the same folder, Qimage will not be able
to perform the association because the ICC profile specified
in the filter is missing. If this happens, the association is
ignored. Also note that once the above association is made,
all ICC profiling operations/rules in Qimage still apply.
Associating a profile with an image only specifies how color
for that image should be interpreted. If you have your
monitor ICC turned off, do not expect to be able to evaluate
the association on screen because no monitor profile has been
specified and therefore no "to" profile exists (only
the "from" profile). Similarly, if your printer ICC
is turned off, the image ICC profile association will make no
difference in prints since you must specify a printer profile
to be able to profile "from" the image profile
"to" the printer profile. Finally, when saving/converting
images that have associated profiles, you must specify a
"to" profile on the filter application menu and
check "Perform Profile to Profile Conversion". For
example, if you have 10 images in the queue, each with a [potentially]
different ICC profile associated, and you would like to
convert all of these images from their associated profiles to
sRGB for display on the web, perform the following steps:
- Since you've already added the filtered
(ICC profile associated) images to the queue, simply
right click on the preview page and select "Convert
Images".
- Check
"Perform Profile to Profile Conversion".
- On the top "From" profile line, delete any
text in that field. The word <input> will
appear. Leave this text intact. This tells Qimage to
"look up" and use whatever profile is
associated with each individual image.
- Click
the selection button next to the "To"
profile and select the sRGB.icm profile from your
Qimage installation folder (normally \program files\qimage).
- Click
"Ok" and Qimage will create sRGB profiled
copies of all images in the queue.